The Mandelbrot Set, Part 2: OpenGL Program
In the last part I tried to give a general overview of how the Mandelbrot set is generated and how it can be rendered using a simple algorithm. This part will focus on programming a simple realtime renderer that can also zoom and move around, as I showed in this video. Additionally, it will serve as small introduction to modern OpenGL programming.
In this tutorial we work with C++, but you may use any other language you feel comfortable with that also binds with OpenGL.
You can also view these sources on Github.
1. Installing Prerequisites
Depending on your choice of programming language these instructions differ, I suggest you to search for them on the internet.
You need: a C++ compiler, GLEW, GLFW3, and OpenGL libraries. Install them with a package manager depending on the operating system you run.
A rough explanation of the libraries:
- GLFW3 is an OpenGL framework that can create graphical contexts across multiple systems. It handles window functions including input.
- GLEW (The OpenGL Extension Wranger Library) gives us greater access to hidden OpenGL extension features that may not be accessible with the standard API.
Now we’ll start coding. Open your vim/emacs/notepad/whatever.
2. Includes
#include <fstream>
#include <iomanip>
#include <iostream>
#include <sstream>
#include <string>
#include <vector>
#include <GL/glew.h>
#include <GLFW/glfw3.h>

using namespace std;
3. Main function
Before we do anything in OpenGL we have to initialise GLFW. This takes only a few steps and is mostly straightforward.
We’ll declare three global variables, width, height, and the window-object itself. Then, we’ll initialise GLFW and set the appropriate settings and then finally also initialising GLEW.
int w = 640, h = 480;/* Default window size */
GLFWwindow *window = NULL; /* Our window object */
double cx = -1.0, cy = -0.5, zoom = 1.0; /* Camera position and zoom value */
int itr = 100; /* Number of iterations */

int main(int argc, char *argv[])
{
    if(!glfwInit()) {
        cerr << "Failed to init GLFW" << endl;
        return 1;
    }

    atexit(glfwTerminate); /* Always terminate GLFW when exiting */

    /* Sets the error-callback function, using lambda here for simplification */
    glfwSetErrorCallback( [](int e, const char *s) { cerr << s << endl; } );

    /* We want OpenGL 4.1, because only that version supports double-precision on the GPU */
    glfwWindowHint(GLFW_CONTEXT_VERSION_MAJOR, 4);
    glfwWindowHint(GLFW_CONTEXT_VERSION_MINOR, 1);
    glfwWindowHint(GLFW_OPENGL_FORWARD_COMPAT, GL_TRUE);
    glfwWindowHint(GLFW_OPENGL_PROFILE, GLFW_OPENGL_CORE_PROFILE);

    window = glfwCreateWindow(w, h, "Mandelbrot", NULL, NULL);
    if(!window) {
        cerr << "Failed to create window" << endl;
        return 1;
    }

    /* Lets us use OpenGL finally */
    glfwMakeContextCurrent(window);

    /* Init GLEW */
    glewExperimental = GL_TRUE;
    glewInit();
The layout is not finished yet as we are missing some kind of render loop. The function glfwWindowShouldClose is a considerable halting-condition for our main loop right now. In the render loop, we clear the screen, swap buffers, and then wait for events (more on that later).
while(!glfwWindowShouldClose(window)) {
        /* Clears the screen */
        glClear(GL_COLOR_BUFFER_BIT);

        glfwSwapBuffers(window); /* Updates the screen */
        glfwWaitEvents(); /* Polls input */
    }

    glfwDestroyWindow(window);
}
We can try compiling it now. Compile flags sadly differ on systems. Generally, Linux users can use this:
g++ -std=c++14 mandel.cpp -o mandel -lGL -lglew -lglfw3
OSX users on the other hand have a slightly different method of linking OpenGL:
g++ -std=c++14 mandel.cpp -o mandel -framework OpenGL -lglew -lglfw3
Explaining this for Windows would be too scary, so you’ll have to figure that out by yourself.
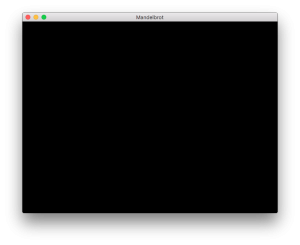
Starting this should leave you with a black screen and no output in the terminal. If there is an error, see if your graphics card supports OpenGL 4.1.
4. Creating the Shaders
To harness the full hardware-capabilities of your GPU we shall use shaders to render the Mandelbrot set at high-speed.
Shaders are little programs that can be directly executed on the GPU. They are therefore utterly efficient when it comes to processing data, as there is no latency between the CPU and the GPU.
Rendering requires a vertex and a pixel shader. As we are working with a two-dimensional plane only the pixel shader is of importance to us and I will not give much effort explaining how vertex shaders work, nor will you need to know how they work.
The creation of the vertex shaders as follows: (before main loop)
const char* vertex_shader =
    "#version 410\n"
    "in vec3 vp;"
    "void main () {"
    "  gl_Position = vec4 (vp, 1.0);"
"}";

GLuint vs = glCreateShader(GL_VERTEX_SHADER);
glShaderSource(vs, 1, &vertex_shader, NULL);
glCompileShader(vs);
Much like other software, shaders are essentially written in source code too (in a C-like language), then passed to OpenGL, which compiles it to byte-code that the GPU can execute. All we need to care about is the handle of the shader as determined by the variable vs.
What matters here is the function
void glShaderSource(GLuint shader,
  	            GLsizei count,
  	            const GLchar **string,
  	            const GLint *length);
which assigns the source code to the shader handle to be compiled with glCompileShader. If length is NULL, then OpenGL expects the source string to be null-terminated.
What is left now is the pixel shader (called fragment shader in the OpenGL API). It will be responsible for rendering the Mandelbrot set, depending on which parameters (which are called uniform variables in OpenGL) we give to the pixel shader.
As you may have previously noted, the source code of the vertex shader is hard-coded into the program. But we will not hard-code the pixel shader, as we may want to play around with colours. The vertex shader will be kept static.
Continuing after the vertex shader:
std::ifstream t("shader.glsl");
    if(!t.is_open()) {
        cerr << "Cannot open shader.glsl!" << endl;
        return 1;
    }
    std::string str((std::istreambuf_iterator<char>(t)),
                     std::istreambuf_iterator<char>());
    const char *src  = str.c_str();

    GLuint fs = glCreateShader (GL_FRAGMENT_SHADER);
    glShaderSource (fs, 1, &src, NULL);
    glCompileShader (fs);

    int success;
    glGetShaderiv(fs, GL_COMPILE_STATUS, &success);
    if(!success) {
        int s;
        glGetShaderiv(fs, GL_INFO_LOG_LENGTH, &s);

        char *buf = new char[s];
        glGetShaderInfoLog(fs, s, &s, buf);

        cerr << buf << endl;
        delete [] buf;
        return 1;
}
The program will now open a file shader.glsl (containing the pixel shader code) and create the pixel shader, and additionally check for compile errors. Note that by calling glGetShaderiv we can receive an integer determining the success of compilation. If the compilation was not successful, we let OpenGL supply us with an info log that will be helpful for discovering the error.
Inside of shader.glsl:
#version 410

out vec4 colorOut;
uniform double screen_ratio;
uniform dvec2 screen_size;
uniform dvec2 center;
uniform double zoom;
uniform int itr;

vec4 map_to_color(float t) {
    float r = 9.0 * (1.0 - t) * t * t * t;
    float g = 15.0 * (1.0 - t) * (1.0 - t) * t * t;
    float b = 8.5 * (1.0 - t) * (1.0 - t) * (1.0 - t) * t;

    return vec4(r, g, b, 1.0);
}

void main()
{
    dvec2 z, c;
    c.x = screen_ratio * (gl_FragCoord.x / screen_size.x - 0.5);
    c.y = (gl_FragCoord.y / screen_size.y - 0.5);

    c.x /= zoom;
    c.y /= zoom;

    c.x += center.x;
    c.y += center.y;

    int i;
    for(i = 0; i < itr; i++) {
        double x = (z.x * z.x - z.y * z.y) + c.x;
		double y = (z.y * z.x + z.x * z.y) + c.y;

		if((x * x + y * y) > 4.0) break;
		z.x = x;
		z.y = y;
    }

    double t = double(i) / double(itr);

    colorOut = map_to_color(float(t));
}
we find a language similar to C. If you can recall the pseudo-code which I presented in the first part, you may find some resemblance.
We have at the top a macro defining the GLSL version, the output variable (which is a pixel), and the sum of input variables (uniforms). Note that vec4 is a vector with four components, which, in this instance, are holding information about a RGBA-pixel.
In the main function, we use the Mandelbrot algorithm to determine the value of the pixel we must return. Note that gl_FragCoord is a built-in variable of OpenGL which determines the currently processed pixel’s screen position. If you have a hard time following the structure of this program I recommend you to review the first part, where I explained in detail the Mandelbrot algorithm.
At last, to put our shaders to use we have to link them by creating a shader-program. This would technically allow us to use multiple pixel and vertex shaders but for now we only use two.
GLuint shader_program = glCreateProgram();
glAttachShader(shader_program, fs);
glAttachShader(shader_program, vs);
glLinkProgram(shader_program);
We can now finally activate the shader by calling the function:
glUseProgram(shader_program);
5. Setting up the VBO and VAO
Before we can do anything with the Mandelbrot set, we will have to fill the screen with a single rectangle. The pixel shader needs a flat 2D-plane which the pixel shader will render to.
A vertex buffer object (VBO) stores vertex-data on the GPU. This allows OpenGL to save time by using the hardware of the GPU to its fullest potential. In our case it is neither necessary nor any more efficient as we only have very little data, but in the modern OpenGL specification there is no other way of rendering something. Also, using shaders requires the use of VBOs.
Let’s declare an float-array before our rendering loop.
float points[] = {
       -1.0f,  1.0f,  0.0f,
       -1.0f,  -1.0f,  0.0f,
       1.0f,  -1.0f,  0.0f,

       -1.0f,  1.0f,  0.0f,
       1.0f,  -1.0f,  0.0f,
       1.0f,  1.0f,  0.0f,
};
These values determine the position of two triangles, which together fill up the whole screen.
Take a look at the coordinate system of OpenGL (which we could actually alter, but that is outside the scope of this tutorial).

The center is at (0, 0), while one half of the width and one half of the height have a length of one, such that the corners of the screen rest at the upper left corner(-1, 1), the upper right corner (1, 1), the bottom left corner(-1, -1), and the bottom right corner (1, -1).
If you now look back at the points we declared you see that each pair of three values (X, Y, and Z; as the we render a 2D-plane the Z value is the same for every corner) signify a corner on the screen which sum up to two triangles, covering the whole screen. Why not just make a rectangle? you may ask. The modern OpenGL standard requires the use of triangles, therefore we could not have just made a rectangle.
The creation of the vertex buffer object as follows:
GLuint vbo = 0;
glGenBuffers (1, &vbo);
glBindBuffer (GL_ARRAY_BUFFER, vbo);
glBufferData (GL_ARRAY_BUFFER, 2 * 9 * sizeof (float), points, GL_STATIC_DRAW);
Again we need to use a handle to create the VBO. We then bind the buffer and upload the point data to it.
The function
void glBufferData(GLenum target,
  	          GLsizeiptr size,
  	          const GLvoid * data,
  	          GLenum usage);
uploads the data from RAM to the GPU. For the size we pass 2 * 9 * sizeof(float) as we have two pairs of three XYZ coordinates. The usage flag determines the memory location on the GPU. As the data will remain static (it would make no sense to alter it) we may pass the flag GL_STATIC_DRAW.
Now we have the data, but OpenGL still is unable to work with it. It does not know the structure of the data. OpenGL therefore introduces another object called the vertex array object which opengl.org defines as:
…an OpenGL Object that stores all of the state needed to supply vertex data… It stores the format of the vertex data as well as the Buffer Objects… providing the vertex data arrays.
Creating the VAO:
GLuint vao = 0;
glGenVertexArrays (1, &vao);
glBindVertexArray (vao);
glEnableVertexAttribArray (0);
glBindBuffer (GL_ARRAY_BUFFER, vbo);
glVertexAttribPointer (0, 3, GL_FLOAT, GL_FALSE, 0, NULL);
Here we have our handle vao which we bind, and set which the appropriate attributes for the data-structure.
The function which is of significant importance here
void glVertexAttribPointer( 	GLuint index,
  	GLint size,
  	GLenum type,
  	GLboolean normalized,
  	GLsizei stride,
  	const GLvoid * pointer);
determines the format of the data. As our data consists of only XYZ-coordinates, we assign an index of zero (meaning the position attribute), a size of three, and a type of GL_FLOAT. Stride is set to zero as there is no margin between the coordinates.
6. Rendering
After we have struggled with setting up all the annoying OpenGL stuff we find we can now finally tackle the render loop and thus incorporate into the program what we have established (I must note that, when I was learning this by myself that my days were long and many nightmares were haunting me in my sleep).
Our final render loop:
while(!glfwWindowShouldClose(window)) {
        glfwGetWindowSize(window, &w, &h);
        glUniform2d(glGetUniformLocation(shader_program, "screen_size"), (double)w, (double)h);
        glUniform1d(glGetUniformLocation(shader_program, "screen_ratio"), (double)w / (double)h);
        glUniform2d(glGetUniformLocation(shader_program, "center"), cx, cy);
        glUniform1d(glGetUniformLocation(shader_program, "zoom"), zoom);
        glUniform1i(glGetUniformLocation(shader_program, "itr"), itr);

        glClear (GL_COLOR_BUFFER_BIT | GL_DEPTH_BUFFER_BIT);

        glBindVertexArray (vao);
        glDrawArrays (GL_TRIANGLES, 0, 6);

        glfwSwapBuffers(window);
        glfwWaitEvents();
}
Here we pass the global variables we defined to the shader at each frame. Then, we also bind the VAO and render it, specifying a triangle primitive, and a vertex-count of six (as each triangle has three corners/vertices).
At last, the fruits of our labour:
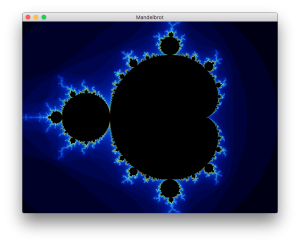
If you happen to encounter problems, please stop and review your code, as it has been a lot of information. Also compare your code with my original source code.
In the next part, I will explain how to further improve the program, as to allow zooming, movement, and such.